I think every PC user knows the term ‘Safe Mode’. It is a startup mode to start Windows without loading any extra drivers or startup programs.
In safe mode the main issue is that we can not connect to the internet or Wifi Network. But to overcome this issue there is an option of starting Windows in safe mode with network.

What is safe mode?
This is useful when we are unable to start a computer normally. Safe Mode is a troubleshooting mode to repair Windows. This mode allows Windows to load with only some basic services and drivers. Consequently, we will be able to perform the administration tasks in a complete and safe way. Therefore, we will be able to detect any possible shortcomings.
On the other hand, by activating safe mode, the system will not have access to network or WiFi functions. This is a strong limitation. Since this element is essential to perform certain tasks. For example, checking the status of connections or verifying connectivity with the server. It is also useful when we require to connect to the internet to download some kind of essential software like antivirus. Let’s explore more about Safe mode with networking functionality.
What is safe mode with network?
As you know Safe mode is an alternate startup option when windows is unable to start in normal mode. It loads the windows without any extra features, drivers except necessary items.
In a safe mode, a user is even unable to access the network or internet. So in this case the option Safe mode with network is helpful. So basically, ‘Safe mode with Network’ is an alternative startup option to start Windows with network support.
It will load the network driver in the safe mode to access the internet or WiFi. Lets learn further how to start with this mode in Windows 10 or in Windows 11.
1) How to enter safe mode with network from the system settings in Windows 11 or 10?
This option is very practical to use, due to its ease of use. The first thing you have to do is to press the Win+R combination to go to the Run box. Once there please enter the following command:
msconfig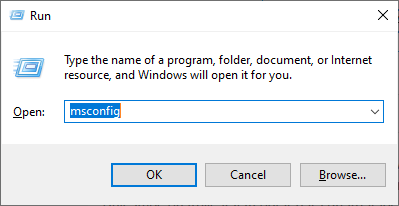
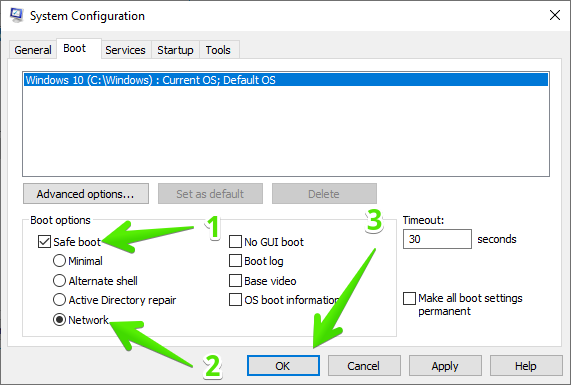
A new window will be displayed immediately. Please click on the Boot tab. Next, check the Safe Boot option and select the Network option. Finally, click OK. Consequently, during the next reboot, the computer will boot into safe mode.
After rebooting in safe mode with network, this time it will load the network and WiFi drivers to connect to the internet. Hope fully it will the solve the issue, as in my case it solved the issue. But some are unable to start the system properly. In that case, I have mentioned some other options to reboot system in Safe mode with wifi support.
2) Boot Safe mode with network from Advanced Startup in Windows 11 and 10
Another way to access this option is through Advanced Startup. There are two ways to access it:
Step 1:
First, hold down the Shift key and click on Restart from the Start menu. This action will take us directly to the Advanced Startup menu of the system.
Step 2:
The second option is available from Windows Settings. To do this, press the Win+I combination. Once there, click on Update and Security.
In the left column, click on Recovery. Finally, in the menu on the right, select Restart Now in the Advanced Startup section.
Step 3:
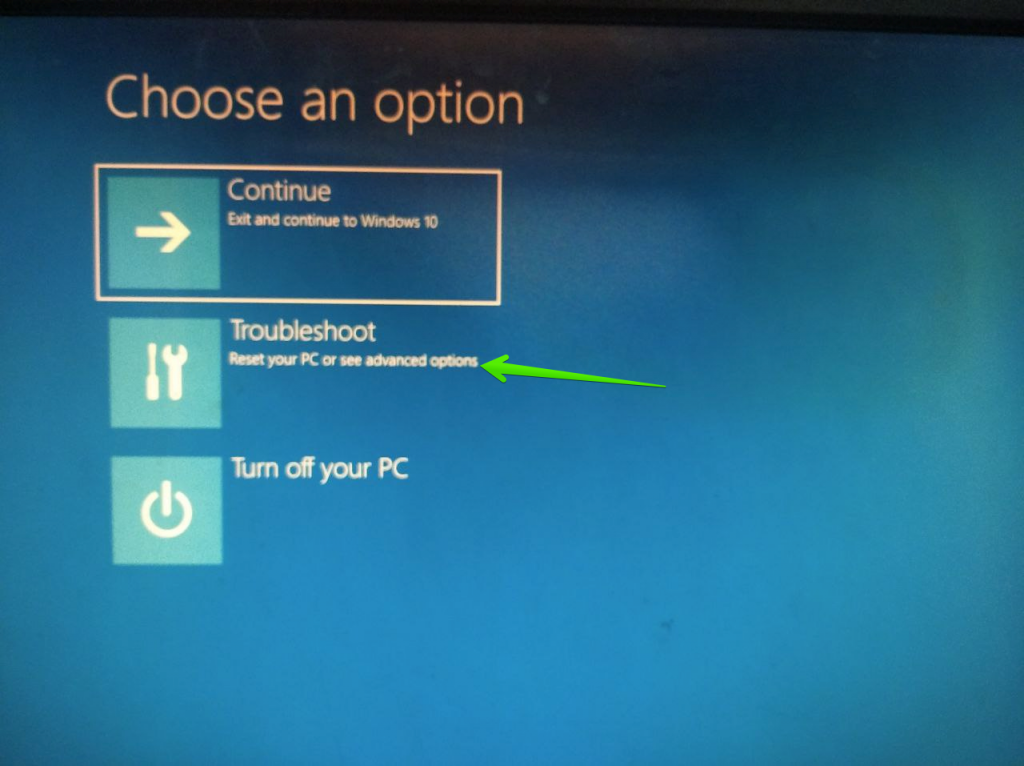
After rebooting the system, you will see the following screen. Please click on troubleshoot.
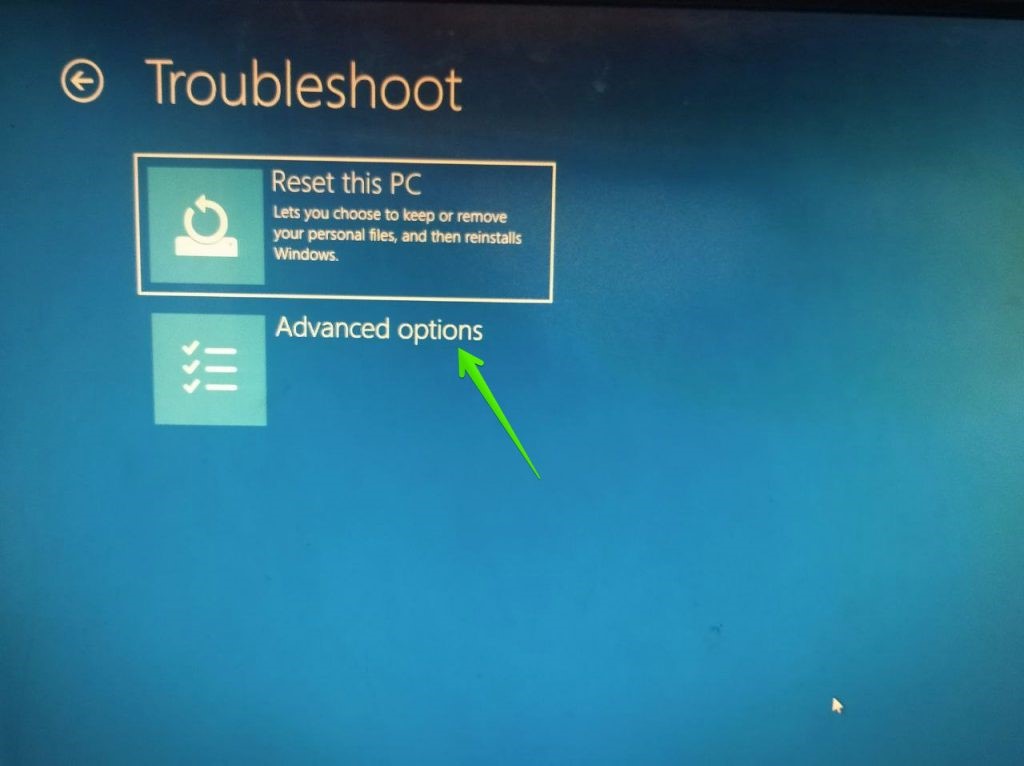
Step 5
In the next window, please click on Advanced Options.
Step 6
Enter the advanced options menu. Just click on Startup Settings.
You will immediately see a brief summary of the available options. Please click on Restart.
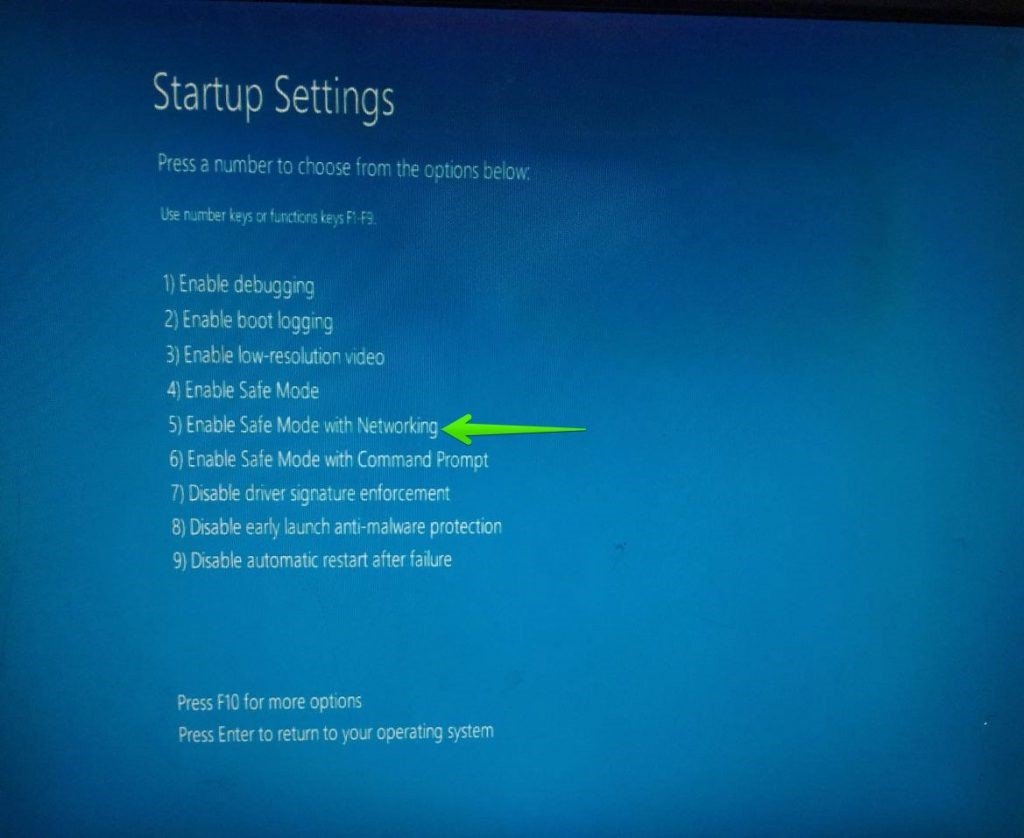
The system will restart immediately. Please press the 5 key. As you can see, you will start the system in safe mode with network functions.
But the above option is only possible when you are able to boot a windows in normal mode. What should you do, if the system is unable to reach to the desktop and stuck between. In this case there are some other alternative methods to start Windows in Safe mode with networking.
3) How to boot into safe mode with network using a bootable disk.
Sometimes the damage is so severe that we cannot access the system normally. In such cases, we can still log in using the repair function. To do this, we need a bootable USB drive for Windows 10 / 11. Look at what you have to do.
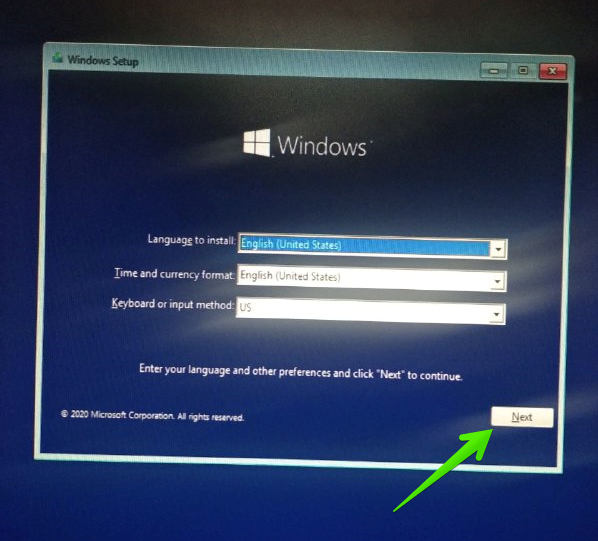
First, boot from the installation media. Please click Next.
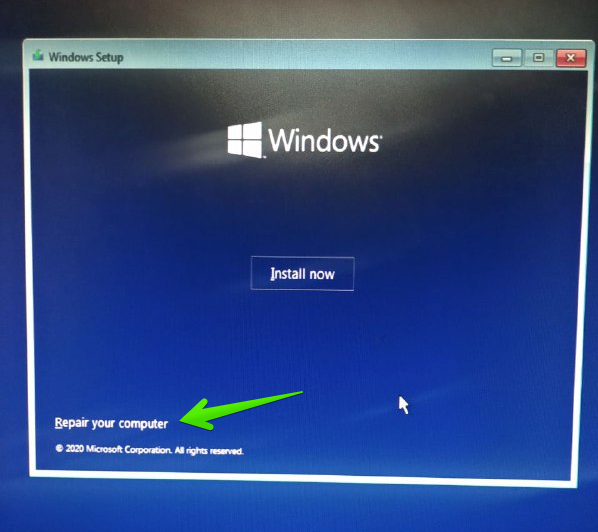
On the next screen, just click on Repair your computer.
Now, click on Troubleshooter.
Consequently, repair options will be opened. But here is no option to start windows in safe mode, But you can do so from the command prompt. Please click on the Command Prompt.
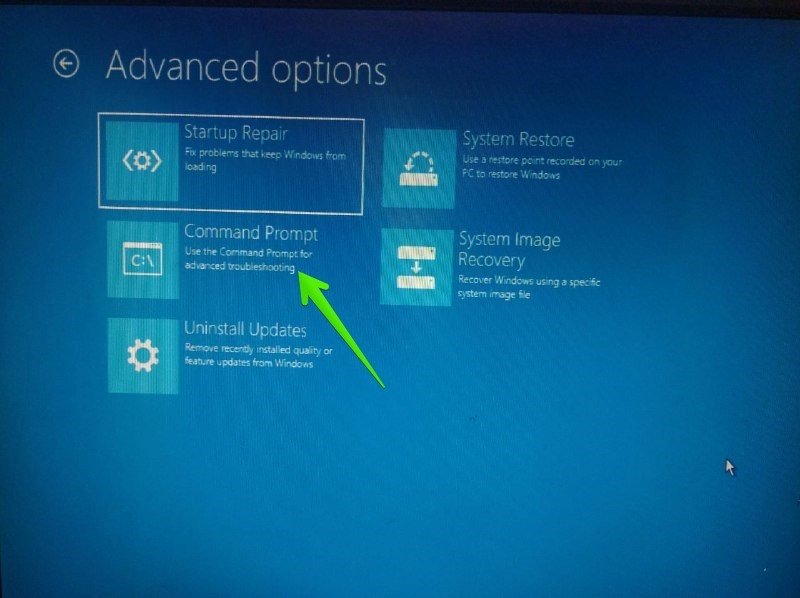
As you can see, a system prompt will open. Please run the following command:
bcdedit /set {default} safeboot network

Pressing enter will start loading the system in safe mode with network functions. At the end of the day, we have seen different ways to activate this mode. Therefore, you will be able to perform the repairs you deem necessary.
Finally after restarting the Windows in Safe Mode with network support you will be able to connect to the WiFi Network.